Ok, here we are, it's the future! Well, you see, it is for me, as I'm writing this one week ago. Thanks to Blog Magic, I can prepare a draft and publish it whenever I like. Which is great, because I am currently in Fiji with my family, enjoying a well deserved holiday and playing some music with the locals. Bula!
At least I will be, when I post this. Today is
Painting Table Saturday and here is something I prepared earlier...
So, what is this OSL? Object-source lighting is when you paint reflections of light on your miniature from an object they are holding, wearing, or in some cases, a part of their body that emits an eerie glow. I dug out a great old Citadel adventurer with a lantern to show this technique. You may recognise him from the last episode:
http://hitstokill.blogspot.co.nz/2014/06/painting-table-saturday-31-base.html
There are a few ways to achieve effective object-source lighting (including using spray paint, which is not my forte). I opt for a mix of underpainting (black and white), washes (for shadow) and drybrushing (for the reflected light) on this figure. Because the adventurer is holding a lantern out in front with an outstretched arm, the light will come from that source. The lantern itself will be the brightest, then anywhere that it's light would shine upon comes next. After I shine the light, I know where the shadow falls and how deep it is cast. This includes the ground he's standing on, upon which I also painted his shadow.
 |
| Welcome back to my painting table. |
The underpainting of this figure can be seen
here. Basic black wash as an 'undercoat', then drybrushing with white wherever I believe the light would shine. This was followed by a yellow ink glaze over the white. I then got busy adding the colours to clothing and equipment. Brown (chestnut/smoke/sepia) and black washes were applied to areas in shadow.
 |
| Plenty of lantern light. |
 |
| Plenty of shadow. |
 |
| Bringing out the colours that are lit up. |
 |
| Hiding the colours that are, well, hidden. |
 |
| Turning the miniature while painting helps a lot. |
 |
| Light in front. |
 |
| Dark behind. |
 |
| Citadel Adventurer. Grenadier Corrosion Creeper. Hasslefree Kid. |
So, here he is. A stalwart adventurer, delving in the subterranean depths, illuminated by his trusty lantern. Judging by the look on his face, he probably just ran into the Corrosion Creeper above!
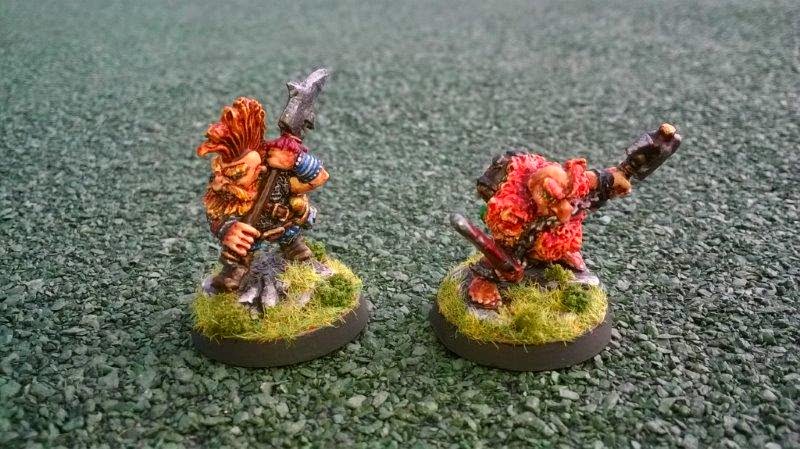
But wait, there's more! I've been slowly completing my set of classic Dwarf Lords. They are classic Citadel miniatures and quite the collectors item nowadays. Here is the current count:
 |
| Five down. Three to go! |
Finally, I present two more Dwarf Lords of Legend: Kimril Giantslayer and Throbbin Death Eye!
But wait, there's even more! Oh, it's just the Grenadier Corrosion Creeper you saw before. This is from the Subterranean Horrors box set. Another classic 80s miniature! I no longer have the box it came in. It was found lurking in my collection of unpainted weird and wonderful alien creatures, most of which are Grenadier masterpieces. Due to an overspill of white paint, it got an undercoat. As I was using yellow ink, it also got a glaze, followed by an orange wash because I was painting the miniatures above. By now, I reckoned that this was a Fire Slug. Impressed as I was with my own imagination, a quick google search informed me that there is already a sea creature and a Harry Potter creation called that. I wonder which was named first? Anyway, by now it was too late to turn back. Red ink, chestnut ink, a drybrush with some pale yellow and, voila!
Oui, that was a snail reference. Escargot anyone? I will finish this dish when I get back from Yanuca Island.
 |
| Grenadier Corrosion Creeper. |
 |
| Sandpit sand and some small bits of gravel add grit to the base. |
 |
| Kimril Giantslayer - Up close and personal. |
 |
| Old paints die hard! |


